Budget Help
- Key Concepts
- Getting Started
- Work with Accounts
- Work with Envelopes
- Work with Income
- Record Transactions
- Work with Transactions
- Calendar
- Investments
- Calculators
- Import/Export/Sync
Import:- Importing QIF/OFX Files
- Imported File Matching/Recording
- Manual matches for imported transactions
- Configuring import rules
- Reports/Statistics
- Preferences
Configuring Import RulesYou can create simple rules to help determine how your imported QIF/OFX data will be set to use your envelopes and accounts during the import process. Click the Account tab to display the settings for accounts. 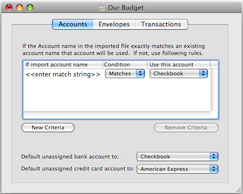
Click the Add Criteria button to add a new criteria. Enter any string of characters that is in the account information in the QIF/OFX file. Use the selector to set if you want an exact match or if the characters are just part of the import data. Set the Budget account you want to be used if the import file has the matching account information. Set the bank account you want to use if there is no matching information for each type of bank account. Click the Envelope tab to display the settings for envelopes. 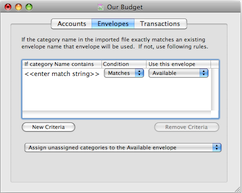
Note: the section only applies if the imported file has category information. Click the Add Criteria button to add a new criteria. Enter any string of characters that is in the category information in the QIF/OFX file. Use the selector to set if you want an exact match or if the characters are just part of the import data. Set the Budget envelope you want to be used if the import file has the matching category information. Set what you want Budget to do with import categories that are not matched. 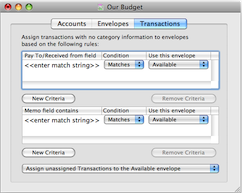
Note: the section only applies if the imported file does not have category information. Click the Add Criteria button to add a new criteria. Enter any string of characters that is in either the Paid To / Received From field or the Memo field information in the QIF/OFX file. Use the selector to set if you want an exact match or if the characters are just part of the import data. Set the Budget envelope you want to be used if the import file has the matching information. Set what you want Budget to do with imported transactions that are not matched. |